
Writing Better Integration Tests with RAII
Drop it like it's hot

One of the many things that makes the Notado codebase a joy to work on is its excellent integration testing suite. The integration testing suite is largely focused around a cast member known as the brain.
notadoThe brain, a Rocket web application that serves notado.app and the GraphQL public API
If you are curious about other parts of the Notado cast, you can also read about the caretaker, notado-postgres-listener, which works to sync data from PostgreSQL to Meilisearch.

Rocket has a pretty good story around both unit and integration testing.
The part that often gets tricky as application complexity grows however, is handling the state of the database across different tests and suite runs.
Resource Acquisition is Initialization
In this article, I’m going to provide an outline for how you can use RAII (Resource acquisition is initialization) to write cleaner and more ergonomic integration tests.
If you don’t know what RAII is, check out this page over at Rust By Example. The most important part for our purposes today relates to the Drop trait.
The notion of a destructor in Rust is provided through the
Droptrait. The destructor is called when the resource goes out of scope. This trait is not required to be implemented for every type, only implement it for your type if you require its own destructor logic.
Defining a Test Context
Let’s start off by defining a test context. This should contain everything we need for setting up and cleaning up after a test. Let’s keep it simple and assume we only need a database name, a Rocket test client and a database connection.

Next let’s consider what conditions we need to be true in order for us to be ready to actually run a test.
We should have a database to run the tests against
Our Rocket test client should write to and read from our test database
That database should have all the required migrations applied
We should have a user account
Our Rocket test client should be logged in with that user account
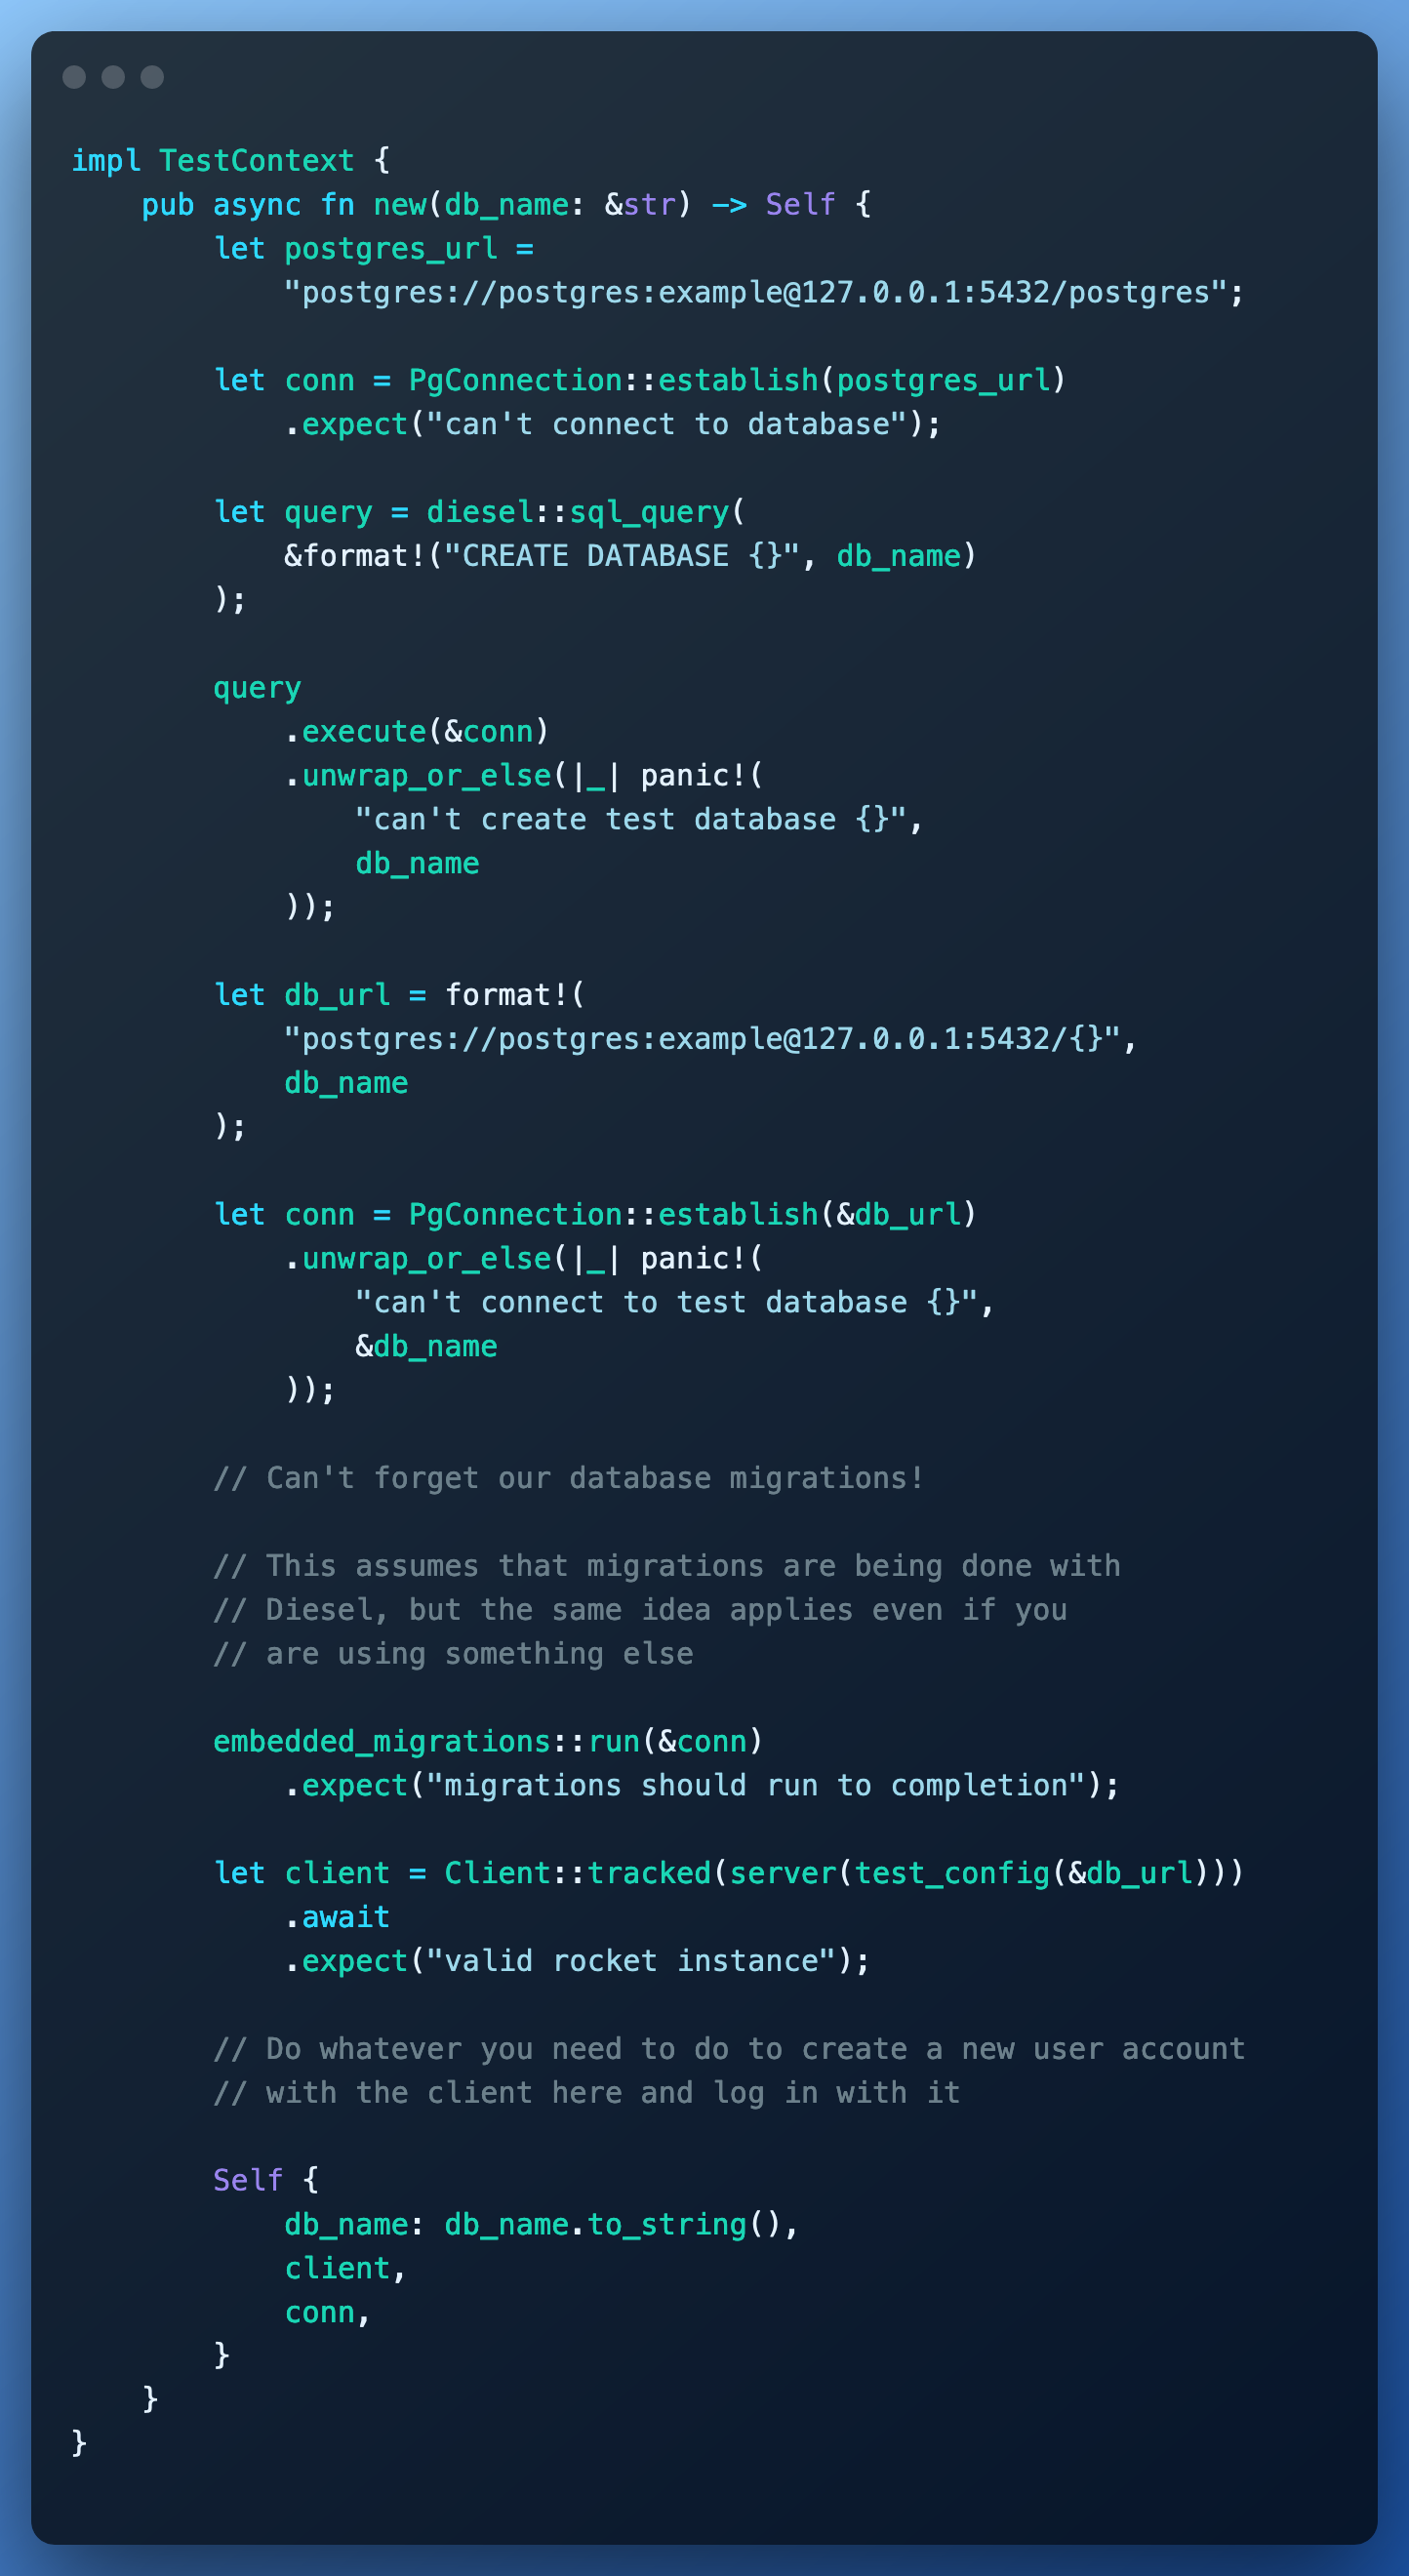
Creating a Test Context
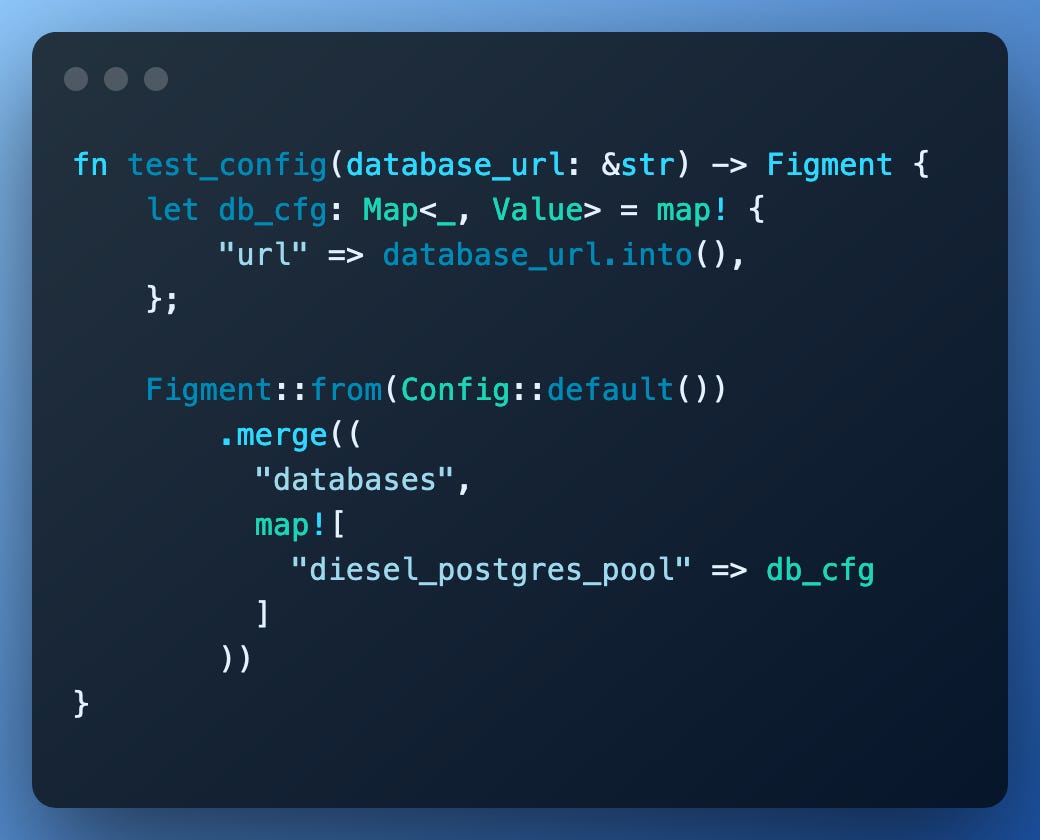
Let’s start with the second point, which is probably the most important since none of this means anything if our tests aren’t hitting the right database!
Although the Rocket documentation is quite fond of using the Rocket.toml file for configuration, for any serious non-trivial application deployed to multiple environments, you will invariably end up using a custom configuration provider pretty quickly. I myself am quite fond of passing the configuration for a Rocket app into a function with the following signature:

Assuming that you have organised your project in a way that allows injecting custom configuration in this way, we can build on top of this in our tests to direct each test to target a different database with a little helper function.
With this, we can now start addressing the other points — creating the database, applying migrations to the database, and doing whatever we need to do with our server to make sure that our test client is logged in with a valid user account.
Writing Tests
Now that we have a way of defining a test context, we can start writing some tests. A healthcheck endpoint is as good a place as any to start.

This is nice and succinct. By calling TestContext::new, we are already creating a new database called “health” and setting up a Rocket test client that is configured to write to that database, which leaves us to focus on writing the actual test and assertion logic.
Unfortunately, if we were to leave things like this and try running the same test twice back-to-back, we would run into issues because the “health” database created in our first run of the test would still exist in our local PostgreSQL instance at the time of the second run.
This is where the Drop trait comes in.
Dropping the Test Context
Think (or scroll) back to our list of conditions that needed to be true in order for us to be ready to run a test.
When we implement Drop for our test context, we essentially want to undo everything we did when we created it. Luckily this is pretty simple; if we drop the database created by a test context, we get rid of all of the previously applied migrations and data inserted during the course of any test execution.
To do this, we can open a connection to the PostgreSQL instance, disconnect any active connections to the test database, and then drop it.

This code will run at the end of every test when the TestContext object goes out of scope, so we can now run our tests back-to-back without worrying about issues related to the state of the database from previous runs.
If you’re working on the codebase of a product where users can only be either signed in or signed out, a single context will most likely be enough.
What about if you’re working on a product where users can be assigned different roles? This is often the case in B2B SaaS web applications.
If you need to run tests from the perspective of different user roles, you can start looking at applying the builder pattern when creating a new test context to ensure that the product-specific prerequisites for different roles are satisfied. Just make sure if those product-specific prerequisites involve manipulating components other than the database, that you are reverting any changes made to them when implementing the Drop trait.
Bonus: Maintaining Tests Without Going Insane
The other part of Notado’s integration test suite which makes for such a pleasant experience is Insta.
Insta is a snapshot testing library that you can use to assert against the state of a database at specific points of the execution of any test.
This is the screencast that sold me on Insta, and if you are someone who struggles with maintaining tests, it’s definitely worth 12 minutes of your time.
Thanks for sticking around until the end! If you want to get in touch, my Twitter handle is @notado_app and you can also find me in the Notado Discord server.
If you would like to reach out by email or request a technical article on a different part of Notado’s technology stack, you can reach me at hello at notado dot app.
If you are interested in what I read in order to come up with solutions like this, you can check out my Software Development feed on Notado, which you can also subscribe to via RSS.
Alternatively, if you’ve had enough technical reading for today, I also use Notado to curate feeds on Addiction (RSS), Capitalism (RSS), and Mental Health (RSS).
Want to publish your own feed? Notado is running a free open beta until the end of 2022!